‘Composites’ (which for a very long time I mistakenly equated with ‘carbon fiber’) were always one of those mysterious materials to me – rare, expensive, difficult to work with, but with incredible strength. Something of a real-world parallel to Mithril or Adamantium, if you will. It turns out that there’s nothing really magic about it […]
‘Composites’ (which for a very long time I mistakenly equated with ‘carbon fiber’) were always one of those mysterious materials to me – rare, expensive, difficult to work with, but with incredible strength. Something of a real-world parallel to Mithril or Adamantium, if you will. It turns out that there’s nothing really magic about it (though production of carbon fibers is still difficult and expensive) when you consider that the hard fiberglass chairs in a school cafeteria are composite (the fiberglass being the base reinforcing material and the epoxy being the binding matrix). I always wanted to learn more about composite fabrication methods, and lately I’ve been learning more than I perhaps wanted to.
It started with stumbling across a video of some East European F3K competitors having a bit of fun with their DLGs (F3K is a class of aeromodeling competition with hand launched RC gliders). I never had any sort of interest in gliders whatsoever – if it didn’t have a motor, what fun could it be? But after watching the video and seeing the incredible capabilities of a 1.5m airframe that you hurl into the air yourself, I was intrigued. I attended a DLG contest in September to learn more about this particular segment of RC flying, and was smitten with the graceful purity of unpowered flight. I now understand what some people see in ballet – I simply had to experience it in a form I could comprehend. After the contest, I decided that I’d like to give it a try myself. Fortunately, Steve Meyer, one of the fellows at the contest (a seasoned competitor who actually qualified for the USA 2011 team) had an old plane that he was willing to sell for a good price and a few weeks later I had my own DLG to try out. Launching it the first few times was equal parts terror and exhilaration, but I started to get the hang of things quickly enough and even managed to catch it a few times (outside square loops on the other hand, well, I’ll give that one a few years). I gained more valuable experience in RC flight during the first half hour with the DLG than I had all summer. I then began to fly it every chance I could get, though the creeping wind and colder weather kept thermals to a minimum. On the last reasonably warm weekend of November, I was flying at the local park, trying to put more power into my launches. When spinning around, my fingers slipped off the launch peg, and I felt more than heard a sickening crack as the plane made a beeline right for the nearest swingset. In retrospect, I had enough time to get my fingers on the sticks and pull up, but was shocked enough that all I could do was watch the impact.
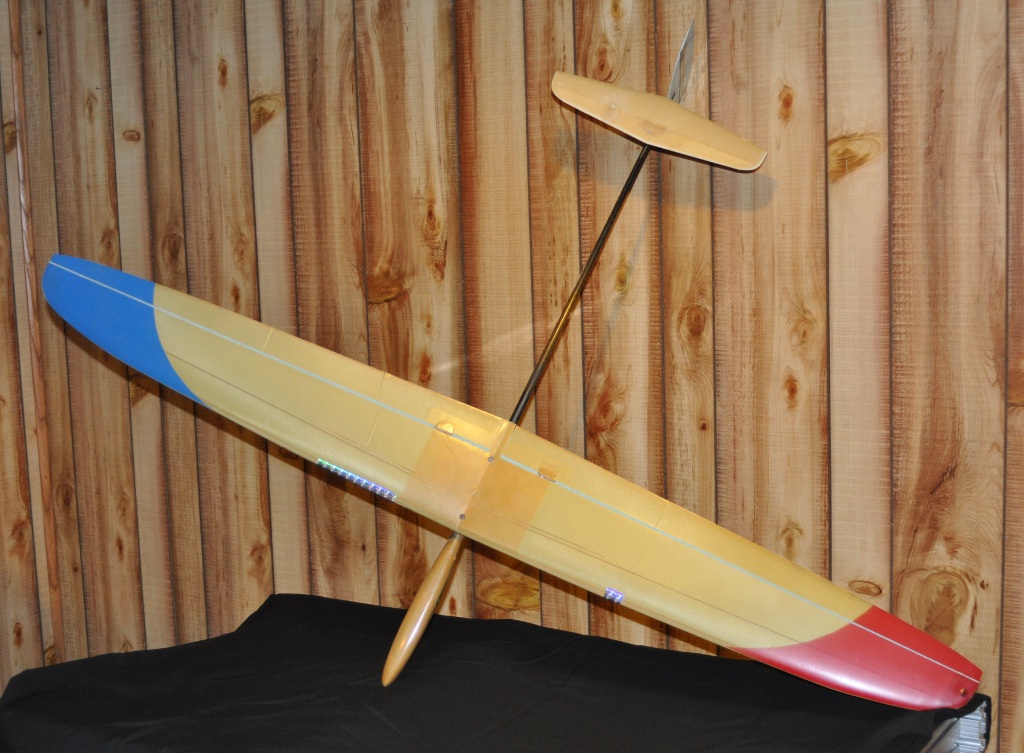
Would you believe that this is what it looked like post-impact? Incredibly, airframe damage was pretty minor – a few small creases on the wings, ailerons and horizontal stabilizer. Really a tribute to the sturdy design of Dr. Mark Drela and Aradhana Singh Khalsa’s beautiful execution of it in kit form (and certainly Steve’s expert assembly of the Light Hawk II). The right aileron servo was completely stripped, but I hoped that it wouldn’t be too horrific to replace and ordered a new Dymond D47 while I surveyed the rest of the damage.
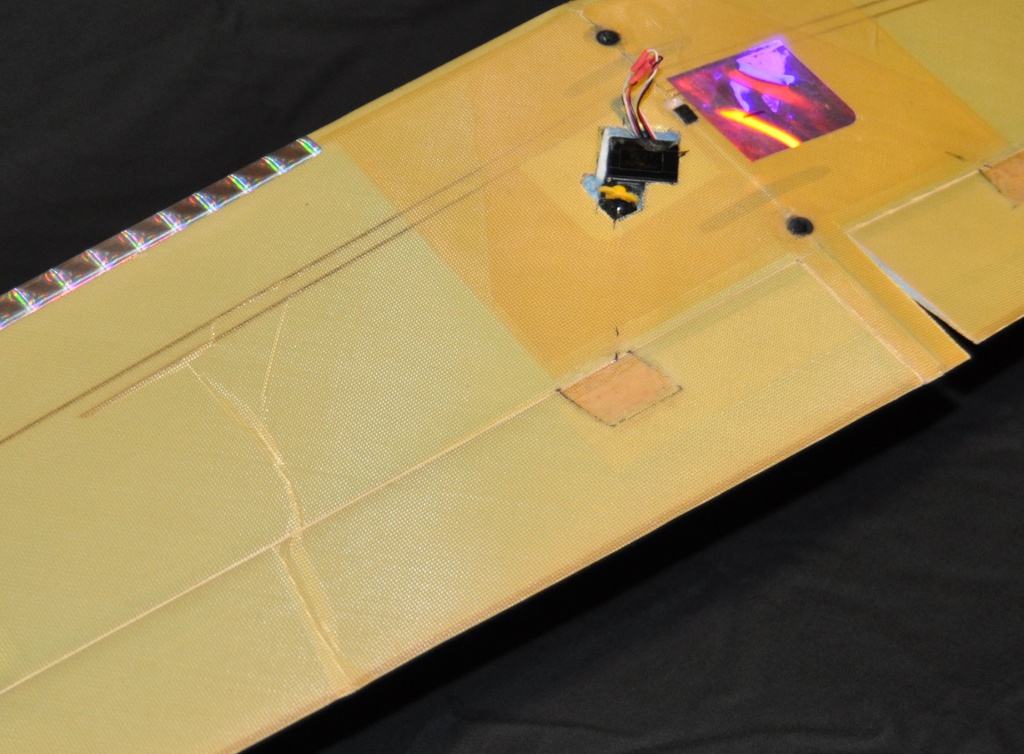
This is the worst of it – a crease on the underside of the right wing (with a slightly smaller matching crease on the top surface), and the reflective tape removed to reveal the stripped servo. The servo has been glued in place, so I’ll need to Drem-mill (Drem-mill? Dremel? Get it? Eh? Er, never mind…) it out of the pocket. Fixing the crease itself would probably be easy, but fixing it well seems a more daunting task. Steaming small dents out of the wing (which is a high strength blue foam covered in Kevlar) works quite well, I found – just pour boiling water over the dent, and the foam magically reverts to an undamaged state (or use an iron pressed against a wet paper towel on the wing). These creases however, don’t steam out – trust me, I tried. So I’m saving them for later while I get up to speed with the basics of composites.
This is the left wingtip, where the launch peg is located. You grasp the peg with your index and middle fingers, whirl around, and release the plane (a left handed pilot would have the launch peg on the right wing). I think the crease in the Kevlar skin just above the peg may be the result of the sickening crack I felt/heard (honestly, I though the peg itself had snapped off). From what I’ve read, this is caused by swinging your arm downward on release (a natural movement, as it’s how you would throw a baseball). This makes sense, as the buckling happened only on the underside of the wing. My plan is to poke a few small holes into the crease, use a syringe to inject epoxy into the damaged area and clamp it to a flat surface while it cures.
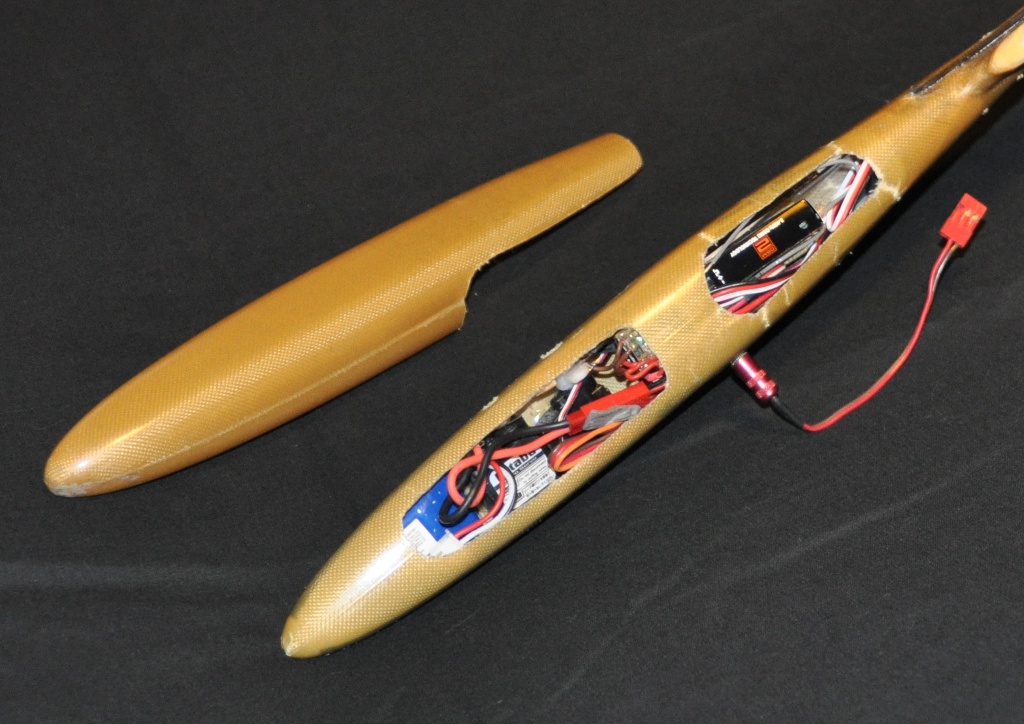
For anyone wondering “why is it made out of Kevlar – you expecting to be shot at? Har har!” – this is the reason. The nose took the brunt of the impact from what I can tell, and you can see the cracks at the 4 corners of the rear cutout of the pod where the epoxy matrix entirely failed. If this was just carbon fiber or fiberglass, I’d have a lot of pieces and fragments in the photo and would be looking for a whole new plane. Carbon and glass are strong but brittle, while Kevlar is extremely tough and the fibers will remain intact to hold the airframe together even with such damage. The nose is one of the most interesting parts of a DLG, if for nothing else than the sheer density of components. The battery is crammed all the way forward with two small servos behind it (I don’t even want to think of the difficulty in getting the control rods connected), followed by a voltage regulator and low voltage beeper, with the radio receiver bringing up the rear. There’s even a ballast tube further back sized for tungsten weights, but I haven’t even gotten to that point yet. The red cord coming off the side of the nose is the charging plug, which you remove to turn on the electronics (this eliminates a standard power switch, saving precious grams). Custom wing airfoils, specific weave patterns of fabrics, CNC made molds for airframe components – these are standard fare for top competitors, making DLGs truly the F1 cars of the air.
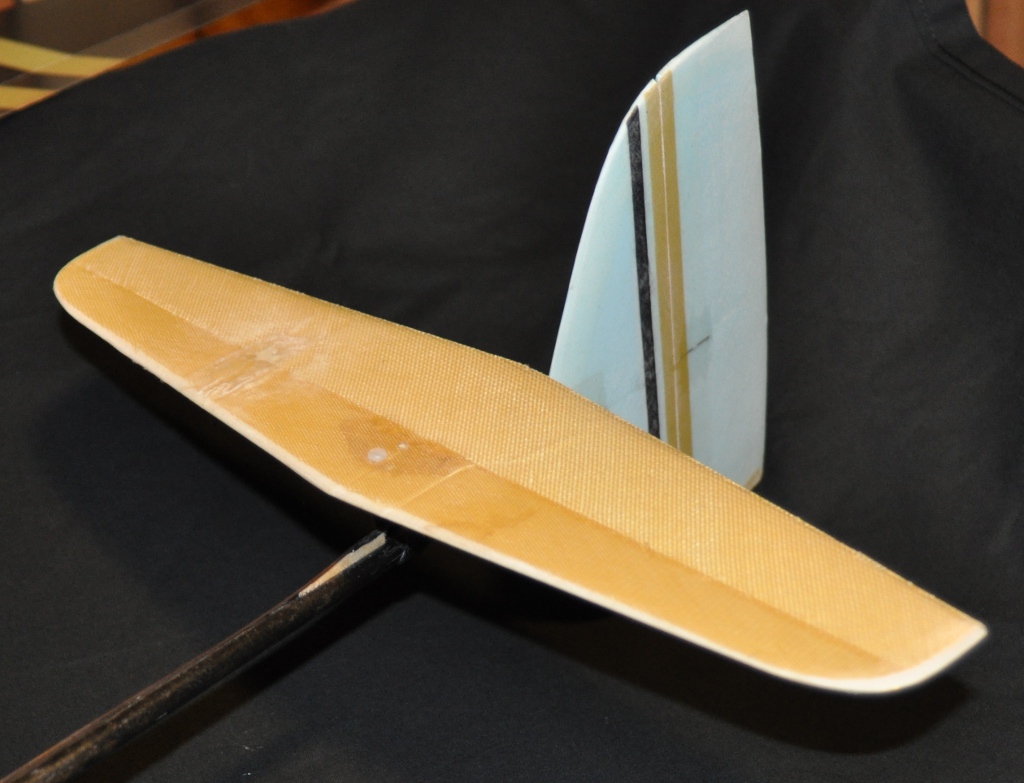
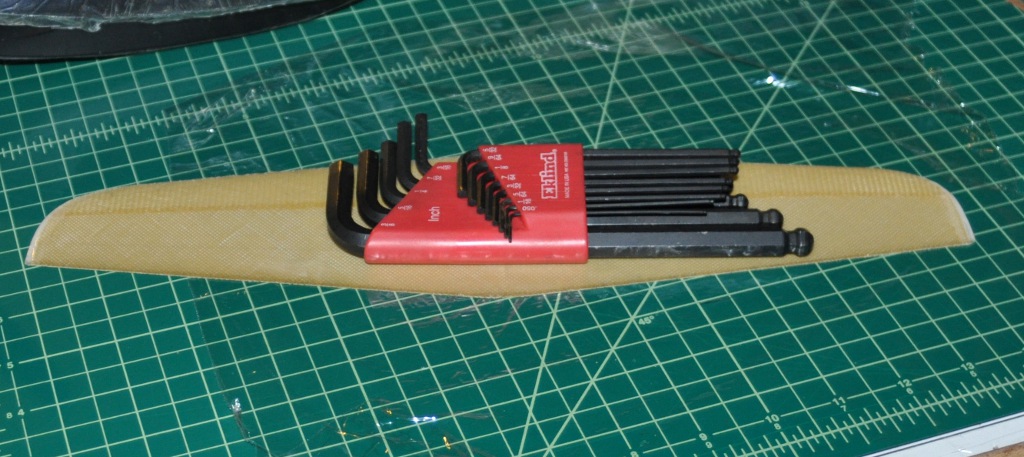
So as a new driver with a broken F1 car, it seemed prudent to start small on the repairs. The vertical stabilizer and rudder (light blue) were unscathed, but the tailplane (in yellow-brown Kevlar) sustained a very slight crease just to its left of the centerline. It was in good company – Steve had pointed out the damage on the right side and had explained to me how he fixed it with a little scrap of lightweight fiberglass cloth and CA (CA is short for short for cyanoacrylate, better known as ‘superglue’ for those who don’t frequent hobby shops or RCG). I steamed out the crease as much as I could, and then applied a small rectangular patch of fiberglass cloth wetted with foam safe CA (regular CA will partially dissolve polystyrene foam, so you have to be a bit careful with adhesive choices).
I used a hex wrench set as a weight to keep the stabilizer flat as the CA cured (a piece of kitchen plastic wrap keeps it from bonding to the cutting mat).
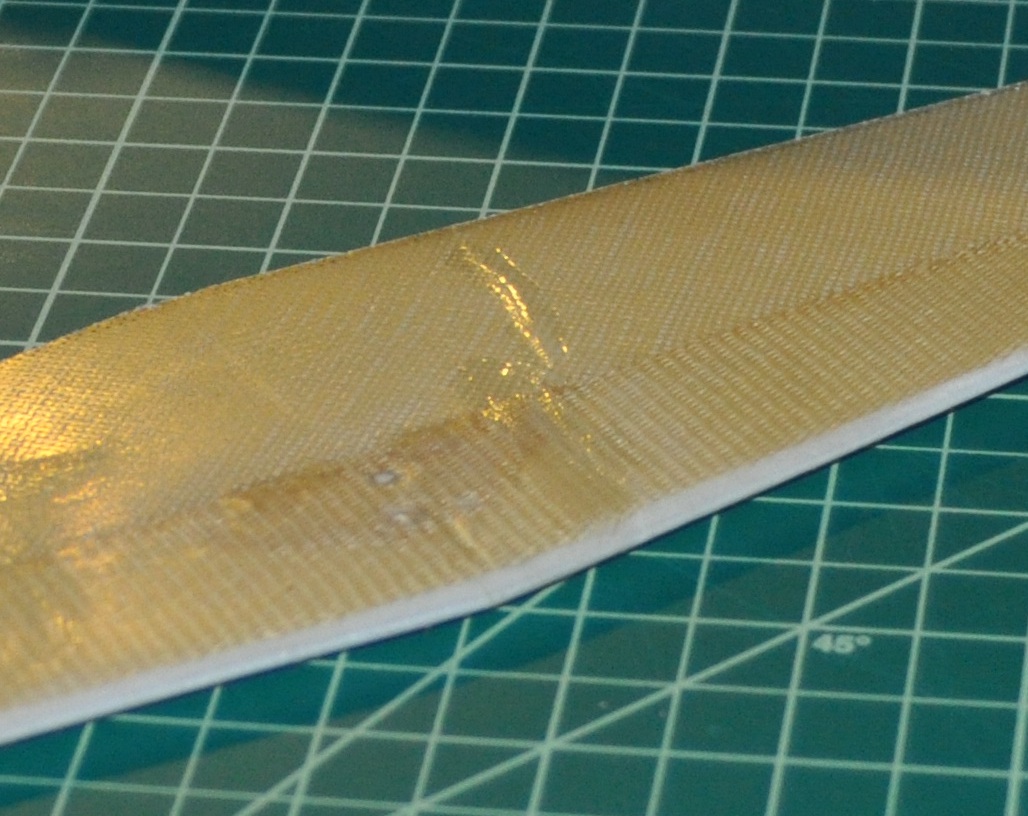
The fix turned out quite well, and I had to position this shot just so in order to glint the light off of the repaired area. The ever-so-slight delamination of the Kevlar from the foam core is no more, and the tailplane is ready for action. Still, the rest of the airframe remains. I decided that getting up to speed with epoxy and fiberglass would be worthwhile before diving into more involved repairs.
One aircraft I’m preparing for the upcoming flying season is a Diamond 2500, which is a giant (at least as far as I’m used to) 2.5m powered sailplane. I chose it because my 2m Radian has gotten a bit boring, and because I wanted a good platform for FPV flying. The Diamond 2500 has a generous amount of room in the fuselage for extra gear, and I’m thinking of making a replacement canopy/cover that has the camera and associated equipment attached (so I can easily swap back and forth between camera ship and sport flyer). So the first thing I tried was to just make a rough copy of the existing canopy.
I started with a piece of plastic wrap taped over the canopy (it easily peels away from cured epoxy) and then draped a piece of 1.4oz (the weight for a square yard of material) fiberglass cloth over the canopy and carefully wetted it out with laminating epoxy by using an acid brush. Once that layer was done, I thought I’d be adventurous and put down a strip of Kevlar tape (which is just the name for a ribbon of woven material – there’s no adhesive involved), which I also wetted out. Finally, I added one more piece of 1.4oz fiberglass and wetted that out, then covered the whole thing with another piece of plastic wrap (hoping that it would help squish down the layers). Well, I now see the value in vacuum bagging, as the Kevlar strip has air inclusions all along it (you can see that it’s only partially wetted out in the center). I was trying not to overdo the resin (very dry layups are the norm when building DLG gliders – every gram counts), but without bagging, there’s no good way to eliminate the trapped air without simply adding more epoxy.
Once I peeled off all the plastic wrap and trimmed the edges, it didn’t look that awful for a first attempt. Rather floppy, though – a little less rigid than if it were made from blister pack plastic. Still, I had absolutely zero concept previously of how a completed part would feel, so now I know that more layers are needed to get the rigidity I need for the part (and that skipping the Kevlar tape is a good idea).
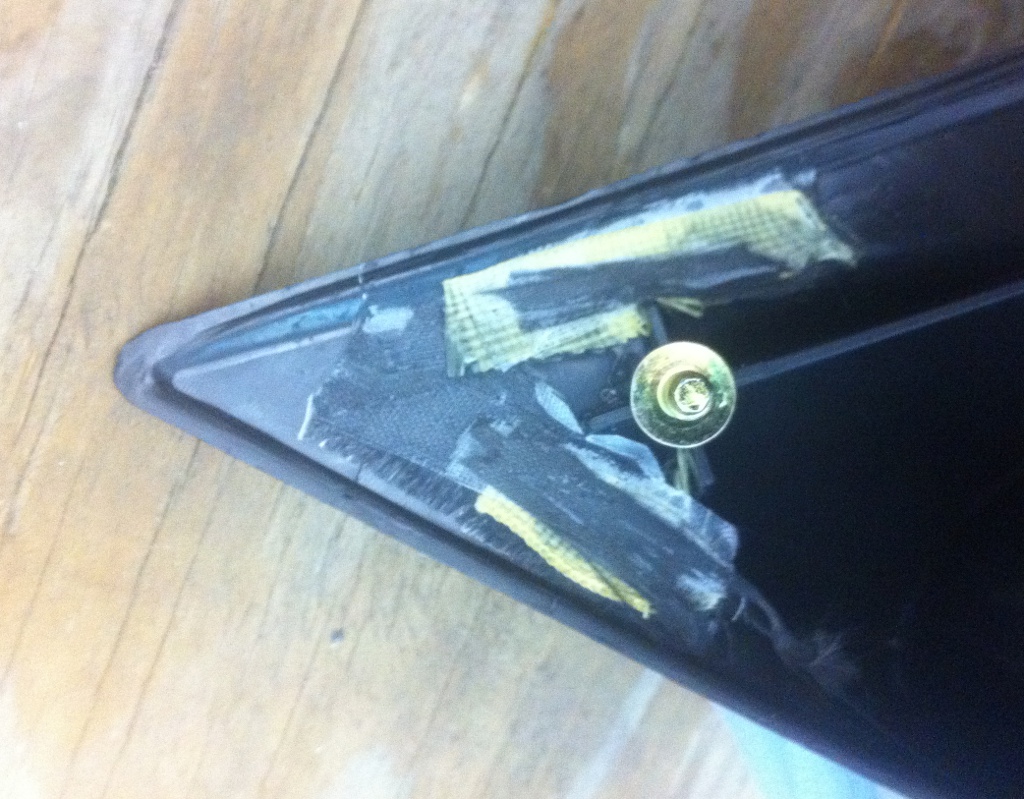
Now that I have some bits of fiberglass, carbon fiber and Kevlar, I realize how useful these can be in simple household repairs. Superglue and epoxy by themselves rarely hold up as well as hoped, but adding a bit of reinforcement can do wonders. On a replacement rearview mirror I purchased for my truck, the plastic tip was broken off in the package. I figured a superglue-only repair would likely fail in short order, so I used a few small pieces of Kevlar and carbon fiber tow sandwiched between patches of fiberglass to act as reinforcement. Dousing them all with CA and letting it cure provided a reasonably stout repair that has held up just fine for several months (and will probably outlast the truck itself).
Ugly, but far more expedient than getting a replacement (and being on the backside of the part, nobody will see it anyhow).



First of all, what exactly is a “DLG”??
Secondly, if you’re going to inject epoxy into the damaged wing area in order to smooth out the creases (sounds a bit like Botox injected into wrinkle lines!), will you have to do a similar injection on the other, undamaged wing, just to keep the weight balanced?
A ‘DLG’ is a Discus Launch Glider: http://en.wikipedia.org/wiki/Discus_Launch_Glider
The other wing also has a little bit of crease damage, so it will get a little epoxy as well. However, the issue of weight balance is an astute observation – when first building a brand new DLG, trying to keep the wing weights equal is important so that the plane will fly level on its own. Even competitors take damage on their planes (though generally not from flying into playground equipment) and need to make repairs, but I don’t believe they would add dead weight just to balance the wings (they’d simply adjust the trim of the ailerons slightly so that the plane flys level again). At any rate, I don’t know that I’m experienced enough that I’ll be able to easily distinguish that the plane is flying oddly due to a few grams of wing imbalance – I’ll be too busy watching out for rogue swingsets.
Dude, your mom is awesome.
Well, she is my mom, after all.