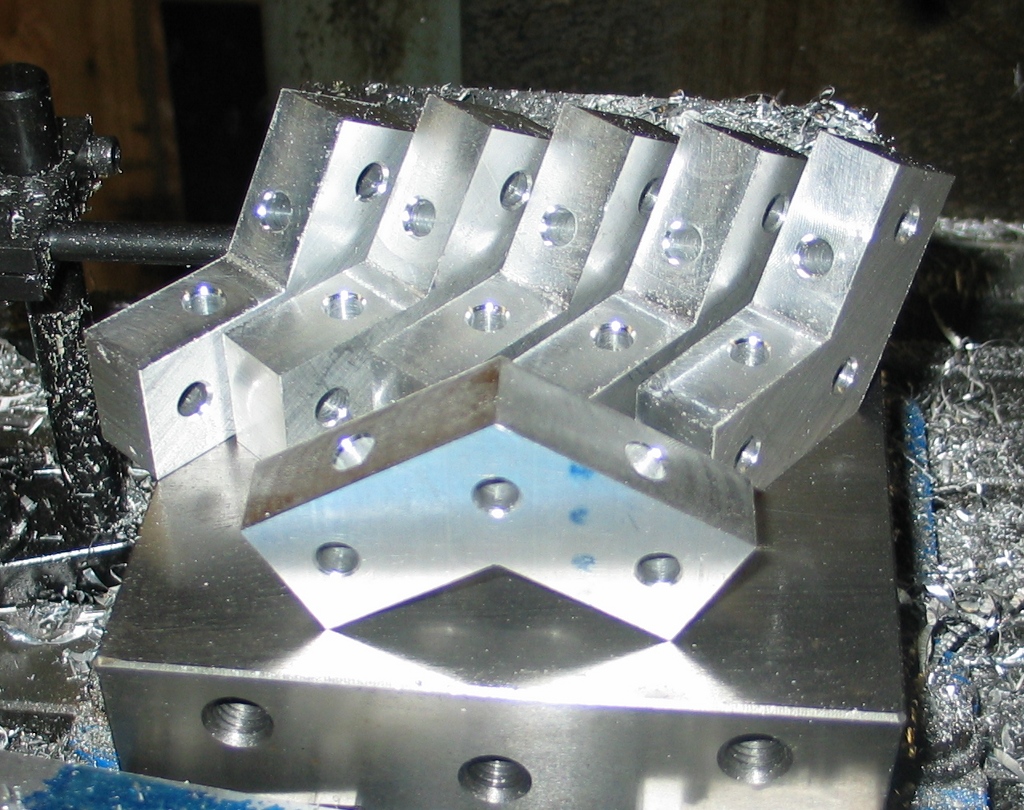
Machining vertex pieces for a v2 ‘Mendel’ RepRap.
I’ve been rather fascinated lately with the RepRap project. In a nutshell, this is a project to build a low-cost rapid prototyping machine. Specifically, RepRap aims to design and build rapid prototypers that can make as many of their own parts as possible, which is a noble goal, but not a design facet that particularly interests me right now. There are other rapid prototyping projects such as Fab@Home and Makerbot’s CupCake CNC (which is based on the earlier RepRap design known as ‘Darwin’), but the latest RepRap design known as ‘Mendel’ is really elegant. Mendel is a far simpler design than its predecessor, has a larger working envelope, and should prove far more scalable – stretching any of the axes for more travel should be pretty trivial if the design ever needs expansion for making larger parts.
Ideally, building a Mendel for myself would start with getting a set of rapid prototyped Mendel parts from someone else, but there seems to be hardly anyone making Mendel parts yet. Besides, I really have no interest in having a ‘pure’ machine that was replicated as much as possible – in fact, I’d prefer to actually machine my own parts for it. I’ve been eagerly following Shane Wighton’s blog, as he also wanted to build a Mendel and has access to a machine shop. We both came across the same issue of trying to view the 3D assembly of Mendel in the downloadable solid model files – the files were created in an academic licensed version of Solid Edge, which the freely downloadable Solid Edge Viewer refuses to display. I thought perhaps it was a video driver issue until I tried running the program on another machine. A student friend who has access to an academic version at school was kind enough to create an eDrawings version of the assembly for me. I’ve used eDrawings created from SolidWorks many times, and they work beautifully. However, the .easm created from a trial copy of eDrawings for Solid Edge was abyssmal. Missing parts galore, including one of the steppers (why it singled out a single stepper is beyond me – they’re all from the same part file). Geometric Ltd. seems to think that the software is worth $395. I suggest they revise that figure downwards by a few orders of magnitude.
I finally realized I’d just have to re-create the parts in SolidWorks. Not a huge deal – SolidWorks barfed a bit on importing the entire assembly of Mendel (no issues with being from an academic version of Solid Edge – take note Siemens, as even competing products are doing better with your own files), but opens the individual .par files quite happily. Like Shane, I decided to start with the vertex pieces – while he opted to use a sine bar in the vise to provide the right angle on the vertex pieces, his use of a tooling ball (which I had never heard of before, and it took me a little while to figure out how they are used) gave me an idea of how I could do all the machining without worrying about angles. The trick is simply in relocating the hole that Shane was using for the tooling ball so that it runs in line with the two outside holes (and using the same diameter for all 3). Then, by using short 5/16″ rods through 2 holes at a time, I can accurately cut any of the faces.
I started with 3 pieces of scrap 3/4″ aluminum plate and drilled six 5/16″ holes though each at the coordinates that I had determined by a CAD sketch. I then bandsawed the pieces in a chevron shape:

Then I ran two pins through the holes of what would be a ‘leg’ on the part and clamped it in the mill vise:
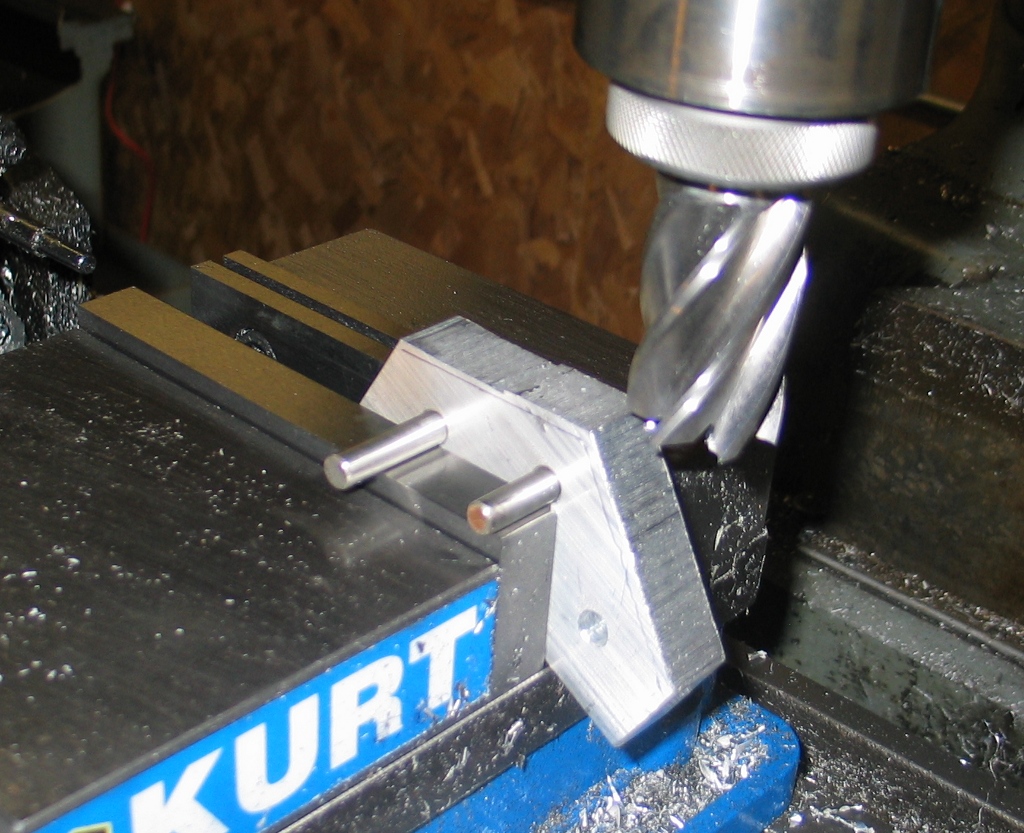
In order to set the tool height, I placed a parallel across the pins and brought the endmill down onto it, then locked the quill, after which I lowered the knee by the appropriate amount:
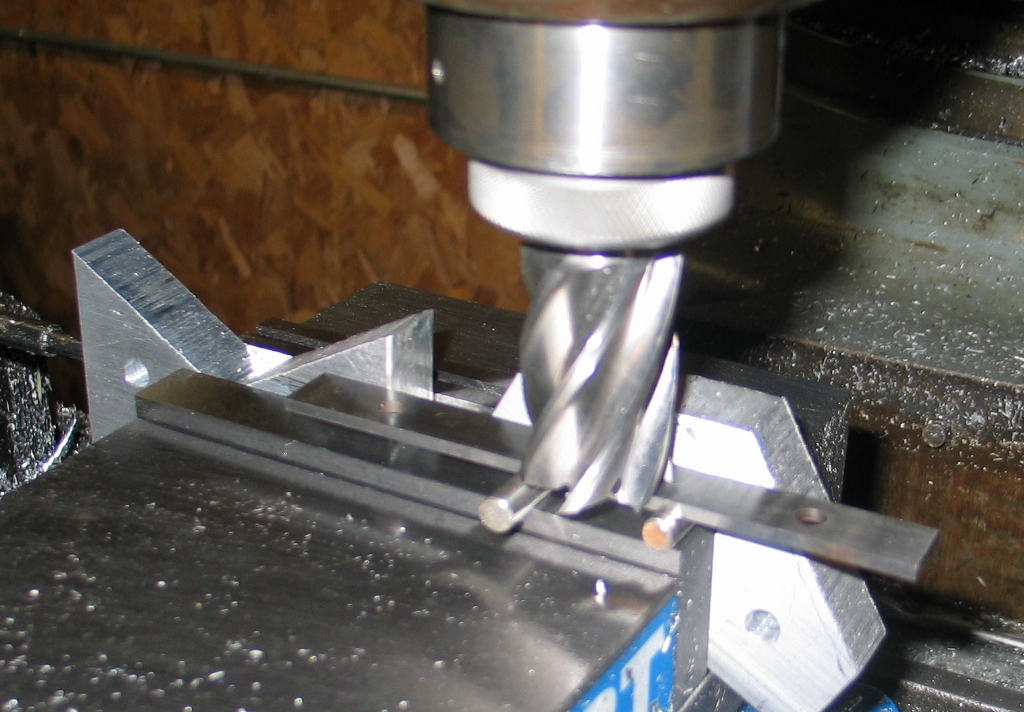
This allowed me to machine the ‘convex’ side of each part. The other piece clamped in the left of the vise is just there to even out the force on the vise, not to have any machining done on it (I actually had something always clamped on the left, but removed it for most of these photos for clarity). To machine the concave side as well as the end of each ‘leg’, I needed to use an end stop:
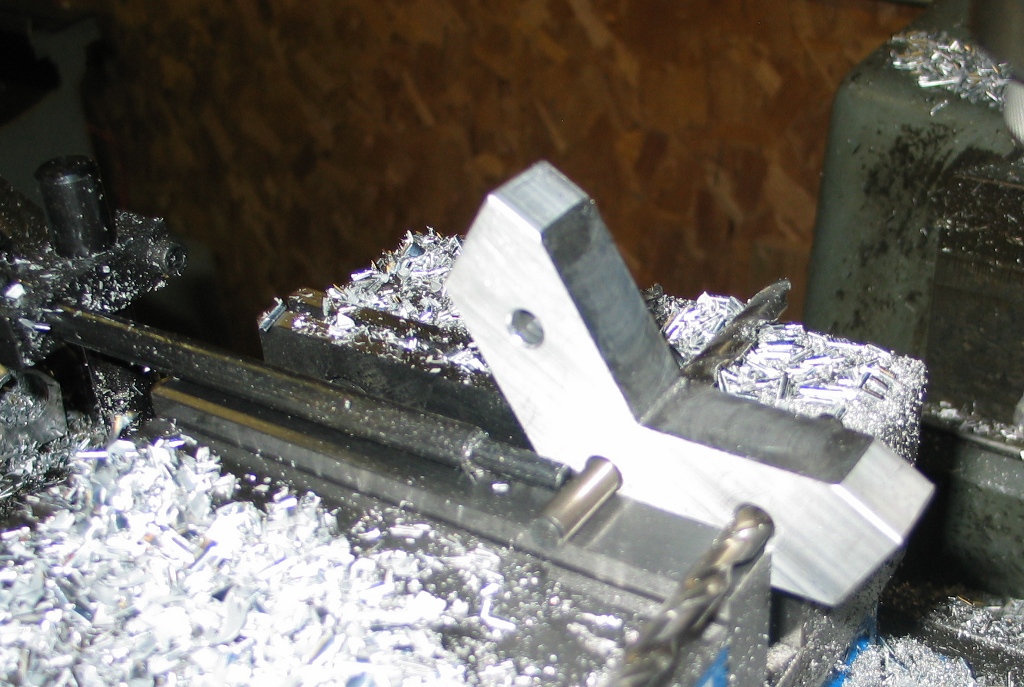
Note that I started using 5/16″ drill bits rather than the 5/16″ pins of the previous photographs. The stainless steel pins were a very tight fit (I didn’t have a 5/16″ reamer on hand, so the holes are slightly undersized) and I had resorted to using a hammer and punch to drive them in and out of the holes. This got old really fast, so I just used a pair of drill bits instead – they had drilled the holes anyhow and were a loose enough fit that I could pull them out by hand, which really sped things up. After machining the ends, all milling was complete, and I just had to drill the two cross holes:
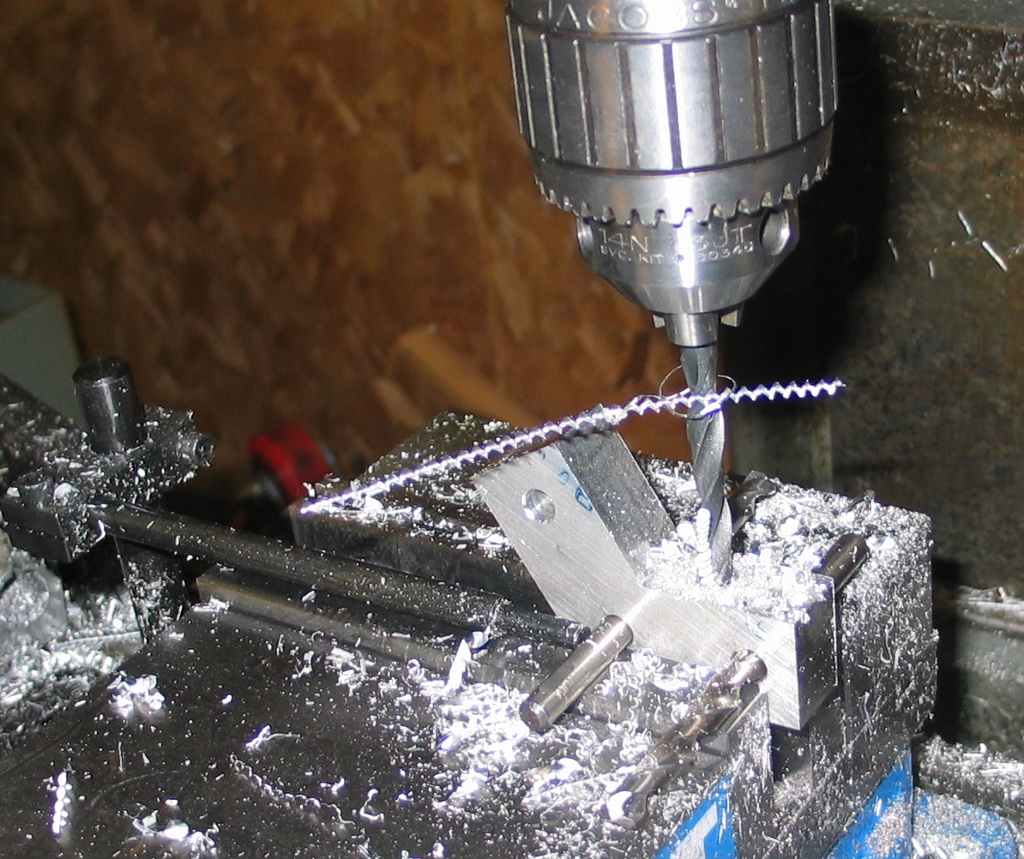
A touch with a countersink tool on all holes and a pass of a file on any rough edges completed the work. I’ll toss them into the vibratory deburrer later to give them a nice even finish.
One last thing – I’d like to give a shout out for Milwaukee Makerspace, which is a group of hackers/makers/tinkerers hoping to start a local ‘makerspace’ (think ‘a place for geeks to play with machine tools’). Come join us – the more people we can get, the cheaper it will be for everyone.
These still look awesome… how’s the project coming?!
Eh, haven’t done anything on the project since – I’ve been working on the vibe deburrer and RPC for the lathe, so dreams of rapid prototyping are on hold for the moment.